
Berry Pie Filling (Homemade, Fresh or Frozen)
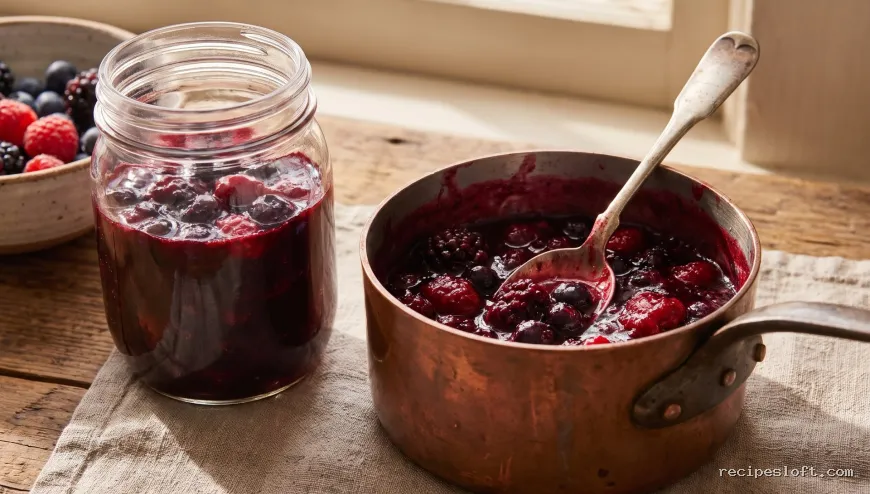
A simple stovetop berry filling for pie made with fresh or frozen mixed berries, sugar, cornstarch, and lemon juice, thickened to a glossy, sliceable consistency perfect for a 9-inch pie.
Cook this recipe
Berry Pie Filling (Homemade, Fresh or Frozen)
Instructions
Prepare the berries
Mix the dry ingredients
Add the berries
Cook until thickened
Finish the filling
Cool before using
Share this recipe
Loved this recipe? Share it with someone who’ll enjoy it.
Cooking guide
Cooking tips and techniques
This berry filling for pie comes together on the stovetop in about 10 minutes using fresh or frozen mixed berries, sugar, cornstarch, and lemon juice, simmered just until thick and glossy. It fills one 9-inch pie and can be made ahead and chilled until you're ready to bake.
What Makes a Berry Filling for Pie Set Up Firm
The thickness of any berry filling for pie depends on the ratio of cornstarch to fruit juice released during cooking. Berries vary in natural pectin and water content, so this recipe uses 3 tablespoons of cornstarch for 5 cups of berries, which is enough to thicken the juices without turning the filling gluey. Cooking the mixture until it reaches a full, steady bubble for a minute or two is what activates the cornstarch; pulling it off the heat too early leaves a thin, runny filling once the pie is sliced.
Fresh vs Frozen Berries for Your Berry Pie Filling
Both fresh and frozen berries work well, but frozen berries release more liquid as they thaw and cook, so you may need an extra minute or two of simmering to reach the same thickness. There is no need to thaw frozen berries first; add them straight to the saucepan and stir occasionally so they cook evenly. Fresh berries hold their shape a bit better, which is nice if you want visible whole berries in the finished pie rather than a smoother, jammier filling.
Common Substitutions for This Berry Filling
You can swap the berry mix to match what you have on hand or what's in season. Any combination of blueberries, raspberries, blackberries, and chopped strawberries works in the same quantities, though very juicy berries like raspberries may need an extra half tablespoon of cornstarch. Lemon juice and zest can be reduced for a sweeter filling or increased slightly if your berries taste flat; vanilla extract is optional and mainly rounds out the flavor rather than changing the texture.
Preventing a Soggy or Runny Berry Pie
A watery pie almost always comes down to under-thickening or under-baking, not the filling recipe itself. Let the cooked filling cool to room temperature before spooning it into the crust, since a hot filling can make the bottom crust soggy before it has a chance to set. Baking the assembled pie until the filling is visibly bubbling through the vents, rather than relying on a timer alone, ensures the cornstarch finishes thickening fully inside the crust.
Storing and Reheating Berry Pie Filling
Cooked berry filling keeps well in an airtight container in the refrigerator for up to 5 days, making it easy to prepare a day or two before baking. It also freezes for up to 3 months; thaw it in the refrigerator overnight before using. If you want to warm leftover filling to spoon over pancakes or ice cream, reheat it gently on the stovetop or in the microwave until it reaches 165°F (74°C) throughout.
Pairing Your Berry Filling with a Pie Crust
Once the filling has cooled, it's ready to go into any standard 9-inch pie shell, lattice-topped or fully covered. For a crust that stays flaky and doesn't turn soggy under a juicy filling, see our never fail pie crust recipe, which covers chilling, rolling, and blind-baking tips that pair well with this filling.
Helpful answers
Frequently Asked Questions
Can I use frozen berries for this berry filling for pie?
Yes, frozen berries work well and can go straight into the saucepan without thawing; they may release more liquid, so add a minute or two of extra cooking time to reach the same thickness.
Why is my berry filling runny?
A runny filling usually means it wasn't cooked long enough; the mixture needs to reach a full, steady bubble for a minute or two so the cornstarch fully thickens.
How long does berry pie filling keep in the fridge?
Cooked filling keeps in an airtight container in the refrigerator for up to 5 days, and it can also be frozen for up to 3 months.
Do I need to cool the filling before putting it in a pie crust?
Yes, letting the filling cool to room temperature before assembling the pie helps prevent a soggy bottom crust.
Can I use just one type of berry instead of a mix?
Yes, you can use a single berry like blueberries or blackberries in the same total quantity, adjusting cornstarch slightly if the berry is especially juicy.
From readers
Reviews
Cooked this? Tell other readers how it went.
Be the first to review this recipe
Keep cooking


